mardi 8 juillet 2014

2-Ingredient Chocolate Fudge Frosting no milk products

source: http://ohsheglows.com/2013/05/20/2-ingredient-chocolate-fudge-frosting/
veganchocolatefudgefrosting 4836   2 Ingredient Chocolate Fudge Frosting
 

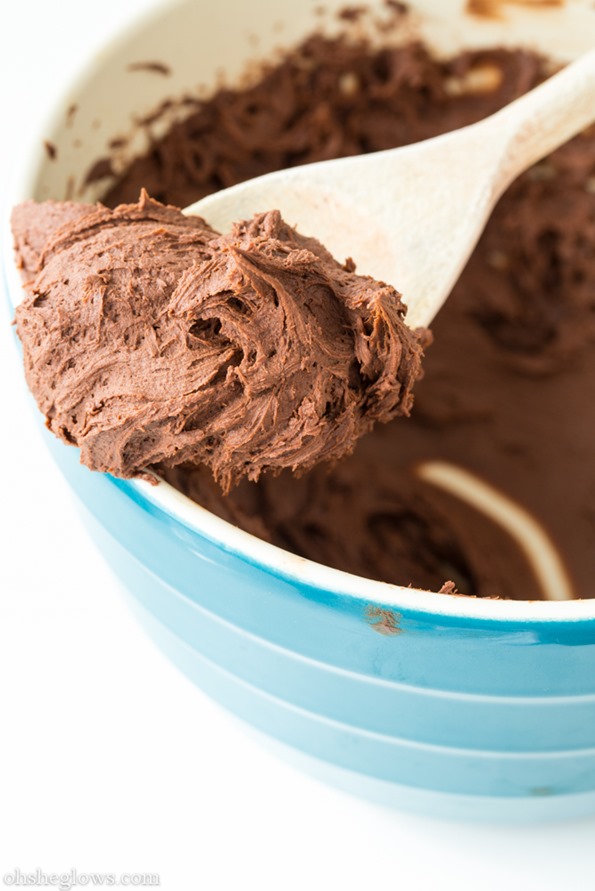
This frosting is quite possibly one of the best to come out of my kitchen. It’s dangerous in the best way possible – creamy and rich without being overly sweet. I really don’t know how I was able to save enough for the chocolate cupcakes.
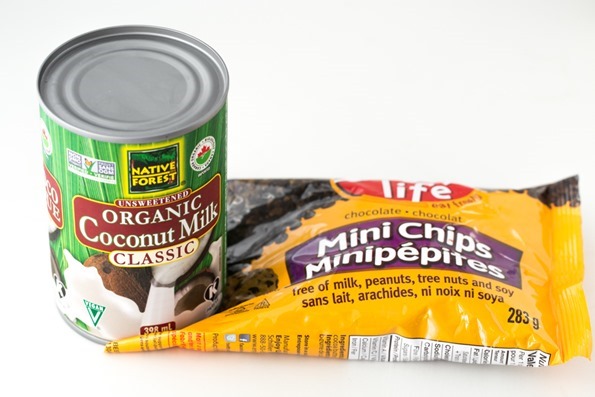
Best of all, it’s just two simple ingredients: Full-fat coconut milk and chocolate. That’s it.
veganchocolatefudgefrosting 4943   2 Ingredient Chocolate Fudge Frosting
 

Yes, you really can make a luxurious, creamy frosting without butter or shortening! Unlike regular frosting, there’s no fussing with icing sugar messing up your kitchen. Don’t you hate it when the icing sugar leaves a coating of powder over all your appliances and counter? I sure do.
With this recipe, the only thing that got messy was my face because I couldn’t stop eating it.
veganchocolatefudgefrosting 4838   2 Ingredient Chocolate Fudge Frosting
 

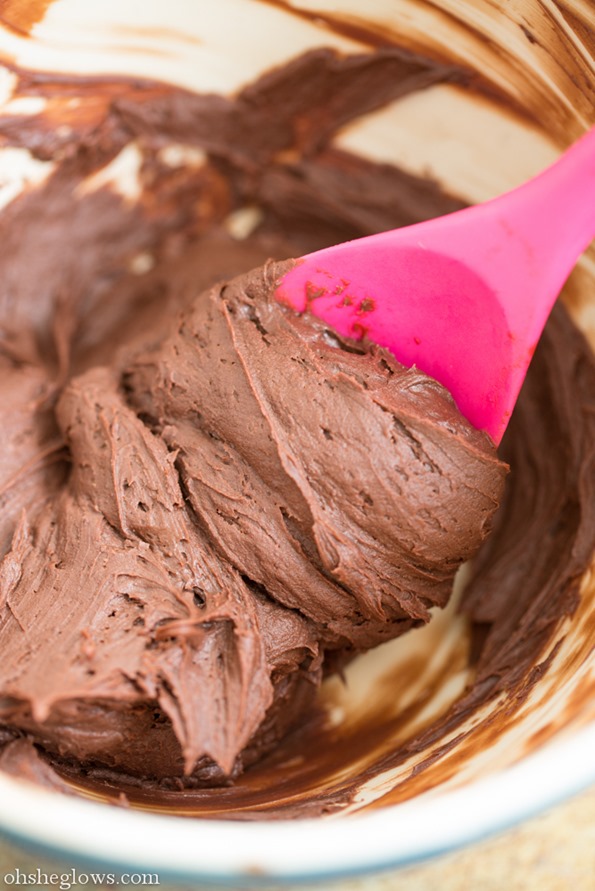
The flavour and sweetness of this frosting will vary depending on the chocolate you use. Most chocolate should work just fine, although I would caution against using a super bitter variety. Stick to under 70% cocoa and you should be safe. If worst comes to worst, you can always add a bit of sweetener if need be. I threw in a pinch of fine grain sea salt at the end to enhance the sweetness.
Insert face into bowl here.
veganchocolatefudgefrosting 4877   2 Ingredient Chocolate Fudge Frosting
 
2-Ingredient Chocolate Fudge Frosting
Email, text, or print this recipe
Yield: 1 & 3/4 cups
Ingredients:

  • 1 can (400 ml) full-fat coconut milk

  • 1 bag dark, non-dairy chocolate chips (approx 285 grams)

1. Chill can of full-fat coconut milk in the fridge overnight. When ready, flip can over and open with can opener. Pour off the water (you can save it for a smoothie or discard). Scoop only the solid white coconut cream into a pot. Add the chocolate chips into the pot as well and gently melt the coconut cream and the chocolate chips together over low heat. Stir frequently and be careful not to burn.
2. Transfer this mixture into a bowl (cover with wrap) and then into the fridge for 2-3 hours (or overnight) until it firms up enough to whip into frosting. You really just have to eyeball it as I expect the timing for individual batches will differ depending on how cold your fridge is. I put it in the fridge overnight and then left it on the counter for the entire morning until I was ready to frost the cupcakes in the afternoon.
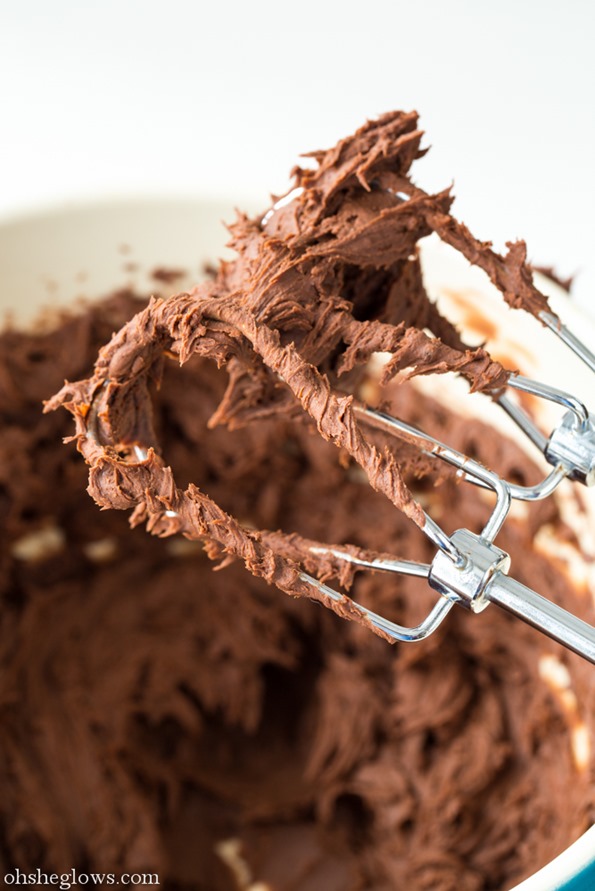
3. When it’s firmed enough to your liking, whip it with electric beaters until smooth and creamy. If it’s still too firm, you can leave it out on the counter for a bit longer. I didn’t need to add any milk to thin it out or any sugar to sweeten – it was just perfect as is! If your batch tastes bitter, you can always add a bit of sweetener to your taste. I also like to add a small pinch of fine grain sea salt to make the flavours pop.
Note: On a hot day, this frosting could melt. Be sure to keep frosted cupcakes in the fridge until ready to enjoy.


Read more: http://ohsheglows.com/2013/05/20/2-ingredient-chocolate-fudge-frosting/#ixzz36r2ShZIn

lundi 7 juillet 2014

Egg Free Chocolate Chip Cookies

source: http://www.sweetlittlebluebird.com/2014/05/egg-free-chocolate-chips-cookies-made.html

Egg Free Chocolate Chip Cookies
Ingredients
  • butter
  • cream cheese (real stuff, no reduced fat or fat free)
  • sugar 
  • brown sugar
  • vanilla
  • salt
  • baking soda
  • flour
  • chocolate chips (I used an entire 12 oz bag of Toll House semi-sweet choc chips)

Crazy Cake Recipe (No Eggs, Milk, Butter or Bowls)


Ingredients
  • 1 1/2 Cups flour (all-purpose)
  • 3 Tbsp. cocoa (unsweetened)
  • 1 Cup sugar (All purchase sugar - Granulated Pure Cane Sugar)
  • 1 tsp. baking soda
  • 1/2 tsp.  salt
  • 1 tsp. white vinegar
  • 1 tsp.  pure vanilla extract
  • 5 Tbsp. vegetable oil 
  • 1 Cup water 

Directions 
(picture tutorial below)

Preheat oven to 350 degrees F.

Mix first 5 dry ingredients in a greased 8" square baking pan.  Make 3 depressions in dry ingredients - two small, one larger (see #3 in photo below). Pour vinegar in one depression, vanilla in the other and the vegetable oil in third larger depression.  Pour water over all.  Mix well until smooth.

Bake on middle rack of oven for 35 minutes.  Check with toothpick to make sure it comes out clean.  Cool.  Top with your favorite frosting.  Enjoy!

Note:  Oven cooking times may vary, be sure to check your cake to make sure you do not over bake.


FROSTING RECIPES:

TIPS:
  • You can double this recipe, just use a 9x13 baking pan.
  • You can also mix the batter in a bowl for neater, easier mixing.  Be sure to follow the directions the same way - mixing the dry ingredients then making the depressions for the wet ingredients.  Don't forget to grease your pan.  You can also make cupcakes - be sure to adjust baking time. 
  • Although I have not used Gluten Free flour mixes for this recipe, many people have and said the cake turns out wonderful!  This is a great tip from someone that made the cake using a GF mix -  "...the mix I use is 1c. brown rice flour, 1c. white rice flour, 1/3 c. tapioca starch, 2/3 c. potato starch, 1tsp. xanthan gum. I've used it in everything from bread to cookies to cakes, and I love it. I do add just a bit more leavening agent *usually baking soda* than the recipe calls for.  For instance, in this recipe I just added 1/2 of what it called for more. So the recipe called for 1 tsp, so I added 1 1/2.  And it was SO good. Hubby didn't even know it was vegan.  And he's a full on man lol. Meat, potatoes, you get it."  She also added another note for this GF mix - "I only increase the leavening on cakes and bread. cookies are fine."   A big thank you goes out to the sweet reader for being so helpful and sharing this tip with all of us! 
  • Many have shared that this recipe is great served warm or cold with just sprinkling powdered sugar on top!  
  • This cake is also a great activity to do with kids!

A sweet reader, Lesley, shared photos of her Layered Crazy Cake and Cupcakes.  Thank you, Lesley, so thoughtful for you to share with all of us!
  • For the layered cake, she greased her pan and used baking paper (parchment paper) on the bottom.  She didn't double the recipe, just cut the cake into a layer.    
  • For the cupcakes, she made a dozen using her muffin tin and cupcake liners.  The cupcakes were baked at 350 degrees F for 13 mins.  (Oven cooking times vary)

Now...go eat some cake!

Thanks so much for stopping by!
Cheers!

lundi 2 juin 2014

Gâteau Façon Kinder délice coco

5 oeufs moyens
115 g sucre en poudre
40 g farine
70 g maizena
30 g cacao
1 sachet levure
1 pincée de sel
1. Casser les oeufs, et séparer les jaunes des blancs.
2. Monter les blancs en neige ferme avec une pincée de sel.
3. Dans un saladier, mélanger la farine avec le sucre, la maïzena, la levure et le cacao en poudre.
4. Continuer de fouetter les blancs en neige, et à faible vitesse ajouter les jaunes d’oeufs et mélanger.
4. Ajouter maintenant le mélange en poudre et mélanger le tout avec une maryse, délicatement, pour incorporer les poudres.
5. Verser le tout dans un moule à gâteau roulé, recouvert de papier sulfurisé, . Enfourner pour 15 minutes de cuisson à 180°, four préchauffé, puis démouler sur un tapis en silicone à la sortie du four.
6. Quand le gâteau a légèrement refroidit, le couper en deux rectangles de la taille du cadre rectangulaire.
7. Déposer le cadre rectangulaire sur un plat, puis mettre au fond le premier rectangle de gâteau au chocolat.
Mousse à la noix de coco
1 blanc oeuf
250 g de mascarpone
60 g sucre glace
1 pincée vanille poudre
4 cuillères à soupe coco rapée
1. Monter le blanc d’oeuf en neige, puis ajouter le sucre glace.
2. Ajouter la noix de coco réduite en poudre, la vanille et le mascarpone.
3. Fouetter le tout pour obtenir une mousse à la noix de coco.
4. Verser cette mousse sur le fond de gâteau au chocolat dans le cadre, lisser à la spatule puis déposer le deuxième rectangle de gâteau dessus. Tasser légèrement, et réfrigérer.
cette partie est facultatif :
Ganache
100 g chocolat
40 g beurre
20 g sucre glace
1. Verser tous les ingrédients dans une casserole.
2. Faire fondre le tout au bain-marie. Quand le mélange est fondu et homogène, le verser sur le gâteau, dans le cadre.
3. Lisser à l’aide d’une spatule et réfrigérer pendant au moins 1 heure. Couper ensuite en rectangles et saupoudrer si vous le souhaitez d’un peu de noix de coco râpée.
4. Ces gâteaux se conservent quelques jours au réfrigérateur, recouverts de film alimentaire. Ils sont même meilleurs le lendemain !

mardi 13 mai 2014

CHOKLADTÅRTA UTAN ÄGG OCH MJÖLK

PÅSKTÅRTAN 
En mörk chokladbotten (Världens bästa om du frågar mig!)
1 ½ dl kakao (Gärna svart holländsk kakao)
4 ½ dl vetemjöl
3 ½ dl socker
1 - 3 krm salt
1 tsk bikarbonat
1 tsk bakpulver
1 msk vinäger
1 ½ dl olja
3 ½ dl vatten
1 – 3 krm vaniljpulver (eller 1 – 2 tsk vaniljessense)
Förbered en formmed fett och ströbröd, gärna på mellan 20 - 22 centimeter i diameter. Sikta kakao och blanda med vetemjöl, socker, salt, bikarbonat och bakpulver. Rör ner vinäger, olja, vatten och vispa tills smeten är jämn. Överarbeta inte smeten, det ska bara precis röras ihop och sedan snabbt in i ugnen. Häll ner i formen och ställ in i nedre delen av ugnen i 175°C i 60 - 70 minuter. Testa om kakan är klar med en provsticka som ska komma ut ren från tårtbottnen. Låt kakan svalna innan den skärs i tre lager. Du kan också grädda i två 15 centimeters formar, då behövs lite kortare gräddningstid, 40 – 50 minuter beroende på ugn, eventuellt längre. Testa med provsticka för att veta när den är klar.
I den här påsktårtan använde jag en pistagefrosting – men du kan använda vilken som helst som du gillar!
Pistagefrosting
150 g rostade pistagenötter
200 g margarin
4 dl florsocker
1 – 3 tsk vaniljessens
1 dl valfri växtgrädde (mer eller mindre till valfri konsistens)
Mixa pistagenötterna tills de är finmalda, vispa sedan margarin, florsocker och nötter luftigt. Häll ner vanilj och grädde och vispa tills frostingen är härligt mjuk. Ju längre du vispar dessto luftigare blir den.
Chokladganash
1 dl valfri växtgrädde
200 g mjölkfri choklad
ev. 1 msk sirap
Vill du täcka tårtan i chokladganash kokar du först upp grädden med eventuell sirap och tar av från plattan när den kokat upp. Bryt ner chokladen och låt den smälta.
Montering av tårtan.
Skär den helt svala tårtan i tre, eller två delar (tårtan på bilden är gjord av två bottnar delade i två lager vardera). Fyll med pistagefrosting och täck eventuellt med chokladblandningen när den svalnat nog för att bli bredbar. Tårtan blir bara godare om den får stå till sig förslutet i kylskåp

samedi 22 mars 2014

Sockerkaka utan ägg och mjölk

source: http://www.allergimat.com/recept.asp?id=60&namn=Sockerkaka-utan-agg-och-mjolk

Ingredienser:
12 portioner
3 dl vetemjöl
2 dl socker
2 tsk bakpulver
2 tsk vanillinsocker (kontrollera innehåll)
50 g smält margarin mjölkfritt
2 dl vatten
Mjölkfritt margarin till formen
Sockerkaka utan ägg och mjölk 
Instruktioner:
För att laga Sockerkaka utan ägg och mjölk
Blanda samman alla torra ingredienser och. Smält margarinet och blanda det med vattnet.

Blanda alltsammans.
Häll i smord, bröad (fiberhusk) sockerkaksform Grädda i ugn 175 grader ca 40 minuter.

Chokladmuffins utan ägg och mjölk

source:http://sockerochmirakel.blogspot.se/search/label/Allergi%20recept

Chokladmuffins

12 st i muffinsform, eller 21 i formar

4 dl vetemjöl
1 dl kakao
3 dl strösocker
2 tsk bakpulver
2 tsk vaniljsocker
2½ dl vatten
3/4 dl Olja / mjölkfritt flytande margarin eller 75g smält mjölkfritt margarin

Blanda alla torra ingredienserna och häll sedan i vattnet och oljan och rör om, det blir en tjock smet.

Grädda i 225ºC i ca 15-20 min i form.
Använder du pappersformar blir de mindre och du får korta ner gräddningstiden till ca 8-10 min

Jag vispade Go Green "grädde" till o spritsade på. Slösa med strössel uppepå ;-)


jeudi 20 février 2014

Mexican crullers (churros)

source: http://www.foodnetwork.com/recipes/daisy-martinez/mexican-crullers-churros-recipe.html

Ingredients
Directions
To make the crullers: In a medium saucepan, heat 1 cup water, the butter, sugar, vanilla, and salt over medium-high heat until the edges of the liquid start to bubble. Add the flour all at once and stir briskly with a wooden spoon until well mixed and no lumps of flour remain.
Remove from the heat. Add 4 of the eggs, 1 at a time, beating well with a wooden spoon after each. The dough should look soft and glossy and keep a "hook" shape when the spoon is pulled from the dough. If not, beat in the last egg.
Scrape the dough into a pastry bag fitted with a star tip. Pour enough canola oil into a deep heavy skillet (cast iron is ideal) to fill 1-inch. Heat over medium heat until the tip of the handle of a wooden spoon gives off a slow steady stream of tiny bubbles. Carefully pipe the dough into the oil, forming 6-inch crullers. Pipe only as many crullers into the oil as fit comfortably. Overcrowding the pan will result in soggy crullers. Fry, turning once, until golden brown on each side. Drain on paper towels. Repeat with the remaining dough.
Put the sugar and the cinnamon in a paper bag. Crimp the top and shake well to mix. Drop a few crullers at a time into the bag and shake until coated. Best served as soon as possible.

SPICED CHOCOLATE & CHURROS CAKE

source: http://thecakeblog.com/2013/04/spiced-chocolate-churros-cake.html

1 1/2 cups unsalted butter, at room temperature
2 3/4 cups sugar
9 egg whites, at room temperature
4 1/2 cups cake flour, sifted twice then measured
2 tablespoons baking powder
1 1/2 teaspoons salt
2 1/4 cups buttermilk
1 1/2 tablespoons vanilla bean paste
  1. Preheat oven to 350. Prepare three 8″ round pans with butter, parchment and flour.
  2. Sift together flour, baking powder and salt. Set aside.
  3. Stir vanilla bean paste into buttermilk. Set aside.
  4. In the bowl of a stand mixer, beat butter and sugar on medium-high using the paddle attachment. Cream until pale and fluffy, about 5 minutes.
  5. With the mixer on low, add egg whites one at a time. Mixing well after each egg.
  6. Add one third of your dry ingredients and mix just until combined.
  7. Add one half of your buttermilk. Mix. Alternate ingredients again. Dry, wet, dry and mix gently. Do not over mix.
  8. Divide batter between the three prepared pans. Bake 30-33 minutes, rotating pans once. Cake is finished when a toothpick comes out clean.
  9. Cool 10 – 20 minutes before inverting cakes from pans. Cool completely before assembling cake. Wrap with plastic wrap and refrigerate if not using until tomorrow.
For the Spiced Chocolate Ganache Filling
16 oz semisweet chocolate
1 1/2 cups heavy whipping cream
2 cinnamon sticks
2 dried chipotle peppers, split in half
1 vanilla bean, split in half and scraped
1/4 teaspoon salt
dash ground pepper
  1. Chop chocolate and place into a medium mixing bowl.  Set aside.
  2. Combine cream, cinnamon sticks, chipotle peppers, vanilla bean, salt and pepper in a medium saucepan.  Bring almost to a boil over med-high heat.
  3. Remove from heat and let steep for 10 minutes.
  4. Reheat again, almost to a boil.
  5. Pour cream through a fine mesh strainer onto the chocolate.  Discard contents in strainer.  Let cream and chocolate stand for 10 minutes without stirring.
  6. Stir to combine the cream and chocolate until smooth, shiny and glossy.  Let ganache cool to room temperature.
  7. Reserve about 3/4 of a cup of ganache for the top of the cake.
  8. Beat the remaining ganache with a mixer on medium-high for about 2-4 minutes, until slightly lighter and fluffier.  This is your spiced, whipped ganache filling.
NOTE:  If ganache is not whipping up nicely, pop it into the refrigerator for 10 minutes and mix again.
For the Cinnamon Swiss Meringue Buttercream
5 egg whites, at room temperature
2 cups sugar
2 cups unsalted butter, at room temperature
1/4 teaspoon salt
1 teaspoon vanilla extract
1 teaspoon ground cinnamon
  1. In bowl of stand mixer combine egg whites, sugar and salt. Place over a pan of simmering water and whisk continuously until temperature reaches 160 on a candy thermometer and the sugar is dissolved, about 3 minutes. (The mixture should feel smooth when rubbed between your fingers).
  2. Attach bowl to mixer fitted with the whisk attachment. Starting on low speed and gradually increasing to medium-high, whisk until stiff peaks form and mixture is fluffy and glossy, about 10 minutes. Your bowl should no longer feel warm to the touch.
  3. With mixer on medium speed, add butter a few tablespoons at a time, mixing well after each addition. Continue mixing until icing is smooth and silky, about 10 minutes.
  4. Add vanilla extract and cinnamon.  Mix until well combined.
Note: If your icing looks curdled after adding the butter, continue mixing and it will return to a silky smooth texture. If it is too runny, simply refrigerate it for a few minutes and then mix it again.
To Assemble the Cake:
  1. Layer your vanilla cake with the whipped ganache filling and stack.
  2. Crumb coat and ice the stacked cake with the cinnamon buttercream icing.
  3. Once shaped and smoothed to your liking, gently coat the sides of cake with a sprinkling of cinnamon sugar.
  4. Create a small mound of the reserved chocolate ganache on the top of the cake.  (If your ganache is setup and firm by now, heat it in the microwave for 5 seconds on 50% power, stir and repeat until soft and spreadable again.)
  5. Adorn with churros, if desired.
Note:  I am not a churro-making expert but tried several recipes when making this cake.  I chose this one HERE for the cake.

( It’s a Miracle! ) Yellow Butter Vanilla Cake

source: http://www.threelittleblackbirds.com/2011/12/yellow-butter-vanilla-cake/

(Makes 3-9 inch rounds, one half sheet cake, or 3 dozen cupcakes.  Recipe can be scaled in half if necessary)
Printable Recipe
339 g (1 ½ cups) unsalted butter, softened
452 g (2 ¼ cups) superfine or bakers sugar (I use organic cane sugar ground fine in a food processor)
5 large eggs room temp
1 tablespoon pure vanilla extract
2 teaspoons sweet sherry cooking wine or madeira
405 g unbleached all-purpose flour – (I use organic unbleached soft wheat flour)
25 g potato starch (if using bleached a/p flour  or cake flour – omit this and add 25 g more flour)
1 tablespoon baking powder
½ teaspoon baking soda
3/4 teaspoon kosher salt
296 ml (1 1/4 cups) buttermilk
8 ounces (1 cup) sour cream
Instructions:
Turn oven on to 350 degrees. Place oven rack in the middle of the oven.
Generously butter the pans then place parchment paper (cut to fit) on the bottom of the pan only. BTW: I am making a 6 inch, 3 layer cake for this blog which will leave lots of batter left over for cupcakes.  For most of my cakes, I bake in 3 inch high cake pans and tort them (cut them into layers) after they are cooled and semi-frozen.  For this recipe, however, you want the shortest amount of baking time to keep the cake moist and tender.  For this reason, I bake this cake in single layers, which means more pans to butter and parchment.  In the end, the extra work is definitely worth it. Alternatively, you can also bake this recipe in a half sheet pan and then cut your layers out of that (works well for smaller cakes), and then you are only dealing with one pan.
To cut the parchment paper to fit: Place the cake pan on top of a sheet of parchment paper, using a pencil draw around the edge of the pan. Cut out with scissors and place the paper pencil side down into the buttered pan. Set the pan(s) aside.
Have all of your ingredients ready.  Remove the sour cream and buttermilk from the fridge and set on counter to warm up just a bit.  Make sure your butter is room temperature and measure out amounts on a scale or by volume.
It’s very important that your eggs be room temperature so they don’t turn the butter cold when incorporated and produce lumps (which can cause large air bubbles in your cake).  I never take my eggs out to warm up before hand however.  Instead, I remove my eggs cold from the fridge, place the eggs into a bowl and cover with warm water while I prepare the batter.  By the time I need them, they are room temp.
In your mixer fitted with the paddle attachment, beat the butter and the sugar together.
TLB Tip: Don’t rush this important step. I usually mix for a minimum of 5 minutes. Start on low speed until the butter and sugar are well combined then crank the mixing speed up to medium high and let it go until light in color and very fluffy. You want to incorporate a lot of air here so that the texture of the cake will be light and airy. If you rush this, the cake will be dense and thick.
While the butter is beating, sift together the flour, potato starch, baking powder and baking soda into a bowl.  Scoop most of the flour mixture back into the strainer and sift one more time.  Add the kosher salt and set aside.
Add the sherry to the butter and sugar mixture and mix well, scraping the bowl as often as needed.
Next, add in the eggs one at a time, scraping the bowl often.
TLB Tip: When a recipe says to add the eggs one at a time, it really means one at a time.  Again, don’t rush this.  Add the egg and mix completely until no streaks of the egg remain.  Stop the mixer and scrape the bowl and paddle down after each addition of egg.  The eggs need their time to emulsify so they can build stability in your cake when baked.
Add the flour mixture to butter mixture on low speed alternating with the buttermilk (mixed together with the vanilla and lemon zest), starting and ending with flour.
TLB Tip: Now is the time to keep the mixer on low speed and never any higher.  We want to keep the gluten levels as low as possible to keep the cake tender.  Once the flour hits the butter, mix only until half way incorporated before adding the buttermilk.  You will still see flour that hasn’t mixed in yet and that is okay because we will render that in the next step.
Remove the bowl from the mixer and scrape off any residual batter/flour from the paddle.  Scrape down the bowl, add the sour cream and fold/stir in the sour cream by hand.
Keep mixing and folding until sour cream is completely mixed in and batter is nice and smooth, making sure to reach down to the bottom of the bowl with the rubber spatula and fold upwards.
Divide batter evenly among pans, lightly tap pans once against the counter to dislodge any large air bubbles and settle the batter.
Bake the cakes until the tops spring back just slightly when touched in the center and a toothpick comes out clean.  About 20-25 minutes depending on your oven and cake size. Start testing for doneness 3 minutes before timer beeps and watch the cakes carefully. Do not overbake.
TLB Tip: When you can smell the delicious buttery aroma of these cakes baking, it’s time to start testing for doneness.  Cakes will let you know, by smell, when they are done cooking. They might not always be done, and you can put them back in for a few more minutes and watch them carefully. But this way, you will not over bake them.
Cool cakes in their pans for 20 min (set a timer). After 20 minutes, cakes will still be warm to the touch, which is what you want.
Place a layer of plastic wrap over the cake still in the pan…
Place a cooling rack over the cake…
With one hand on the bottom of the cake pan and the other on top of the cooling rack, carefully invert the cake over to its bottom…
Carefully lift off the cake pan, and gently peel off the parchment paper…
Wrap the cake with the over hanging plastic wrap and then one more layer of plastic, being careful not to wrap too tight and cause the edges of the cake to be misshapen. Place cakes in the freezer while you clean up and prepare the frosting (this will make the cakes easier to trim, level, tort or shape).
If you will be leaving the cakes in the freezer for an extended time, wrap the cakes again in tin foil over the plastic wrap to prevent freezer burn.  Cakes can be kept frozen for up to 4 months.
BTW: This recipe also makes fantastic cupcakes…
Light, fluffy, moist, buttery, tender…delicious!
FAQ: Is Potato Flour the same thing as Potato Starch? The answer? No!
Potato Starch is a very fine “flour” with a bland taste, that is made by removing the potato peel, made into a slurry and watery mix, then dehydrated to form Potato Starch. The Potato Starch is not cooked, thus it does not absorb much water.
Potato Flour is heavy with a definite potato flavor made from the actual potato including the potato skin and will absorb large amounts of water because it has been cooked and contains the peel. It is not used as main flour in baking as it would absorb too much liquid and make the product gummy.